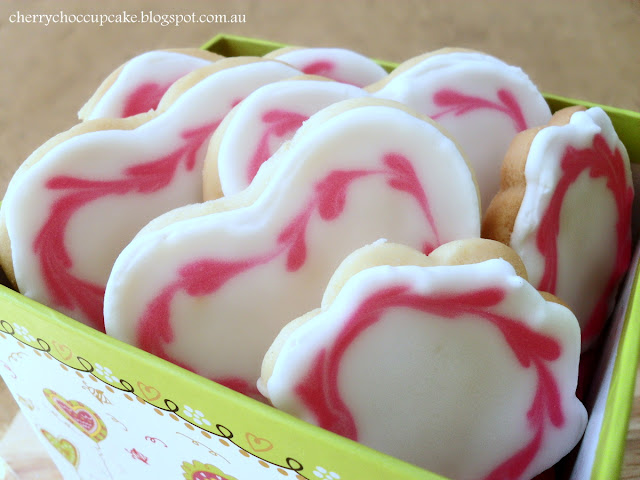
I love, love cookies. Especially the ones that are decorated so beautifully that they look like the most cutest and prettiest things ever. I have been putting this idea off since I added it to my bake-to-do list but after browsing many cookie creations created by other great bakers, I finally decided it was the time to try these. In fact, this is the first time I've attempted to make sugar cookies and decorate them with royal icing. In the end, I was really happy of the results and although it took me about 2 or 3 hours to bake and ice a huge batch of cookies, it was well worth all the time and effort.
What I actually mean by saying that it was worth it, is that these sweet cookies are seriously addictive and really yummy. The soft, buttery and slighly crumbly texture of the cookies melt in your mouth when you take the first bite and the sweet, hard icing matches perfectly with the soft cookie. Now I am kind of obsessed with them and am already thinking about how to decorate the next batch of cookies.... so do you think animal or nature themed cookies are good ideas? After eating the first cookie, I couldn't stop at one!
I decided to start off with a nice, simple pattern that looks like a swirl of connected hearts. You might have seen this technique before but just in case you are curious, all you need is a toothpick and a small batch of royal icing tinted to your desired colour. Then just pipe small dots of the coloured icing around the edge of a wet flooded cookie and drag your toothpick around the dots to create the pattern. So easy and fun to do which was perfect for me as a beginner.
Sugarbelle, who you might know as the cookie queen, makes amazing cookies and has a blog dedicated to her huge cookie love. Her sugar cookie recipe that I found looked perfect for my first batch of cookies and thats when I went with her recipe, which also has helpful tips and hints as well as loads of pictures.
Makes two to two and a half dozen medium sized cookies.
Ingredients:
175 grams confectioner’s or icing sugar
1 egg at room temperature
2 teaspoons vanilla extract
1 teaspoon salt
2 teaspoons baking powder
400-425 grams all-purpose or plain flour
Method:
1. Cream together butter and sugar until light and fluffy. Add the egg and vanilla and mix well.
2. In a medium bowl, sift together flour, baking powder, and salt. Slowly add this to the wet mixture a little at a time until it is incorporated and forms a dough.
3. Immediately roll out the dough to a 1/4 of an inch and dust it with flour if it becomes sticky to handle. Cut cookies into desired shapes with assorted cookie cutters.
4. Carefully transfer the cut out shapes to a parchment or baking paper lined baking tray. Bake cookies in a preheated oven of 204 degrees celcius or 400 degrees farenheit for about 7-8 minutes until the cookies look dry and lighly golden but not brown. Let them completely cool on a wired rack before decorating them with royal icing.
Royal icing from Joy of Baking
Makes a small batch, enough for the cookies I made from the recipe above.
Ingredients:
1 large egg white
1 teaspoon fresh lemon juice
2 cups (230 grams) icing or confectioner's sugar, sifted
For using it for flooding cookies:
2 large egg whites
2 teaspoons fresh lemon juice
3 cups (330 grams) icing or confectioner's sugar, sifted
6. Decorate as desired when the icing is still wet (for me, I used the hearts technique). Let them sit overnight to completely dry.


